Introduction
This tutorial describes how to install the Klipper firmware on a Caribou MK3s printer with Bondtech extruder and "SuperPinda". We use a Mainsail image adapted to the Caribou printer. Attention: The Klipper firmware only works reliably on an original Ultimachine-Einsy (this is installed by default in the Caribou3D printers). With Prusa boards there are problems with the USB/serial bridge under Klipper.
Furthermore the author does not take responsibility for possible damages, which can result from the firmware change!!!
-
-
We need a Raspberry Pi 3 or higher. A powerful power supply is required (original Raspberry Pi with 3A/5V).
-
A Windows 10 PC/notebook with memory card reader or Mac with at least MacOS Sierra
-
A Micro SD card with at least 8 GB memory
-
The Putty program for SSH access to the Raspberry Pi. Download from here for MacOS Cyberduckhere
-
Optional: The tool WinSCP for easy data exchange. Download from here for MacOS via Cyberduck
-
The tool balenaEtcher to write the image file from Mainsail to the SD card. Download from here
-
The editor Notepad++. Download from here - MacOS Boardtool Text Editor
-
You should note important settings of the old firmware (Live-Z etc.) before the clipper upgrade.
-
-
-
First we download the zipped image file (approx. 2GB) from the Caribou server: https://caribou3d.com/Software-MKx/05_Kl...
-
We unzip the zipped file and put the MicroSD into a card reader.
-
New line.We start the tool balenaEtcher , select our file under "select image" and specify the drive with the Micro SD under "Target". With "Flash" the writing process is started.
-
If you have already installed the Win32DiskImager, you can of course also use this tool.
-
Attention: If there are already data on the SD, they will be deleted!
-
When the process has been completed successfully, we eject the SD and immediately put it back into the reader.
-
-
-
Windows will now suggest a repair or formatting if necessary, we click on "Cancel" and open the partition "boot" on the SD in the explorer.
-
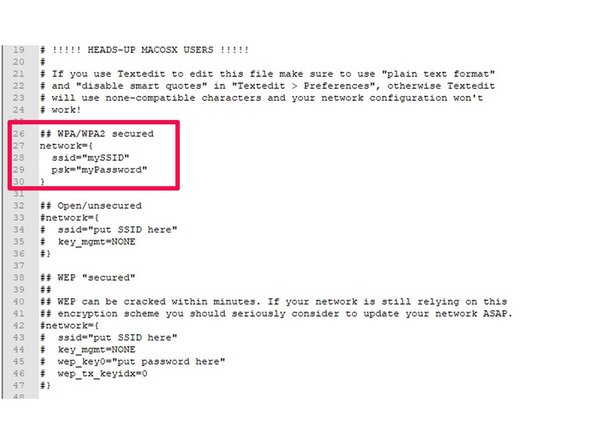
We now search the file mainsailos-wpa-supplicant.txt and open it with Notepad++. There we have to enter SSID and password from the home network in the marked area in lines 28 and 29. We save the changes and eject the MicroSD.
-
Please also change the country code in "country=DE" to the country you are in.
-
-
-
We now insert the SD into the Raspberry Pi and connect the Pi via USB cable to the Einsy. Now the printer and the Pi are booted.
-
We wait a few minutes until the system has booted. Now we can query the IP of our new system via the GUI of our router or by typing ping mainsailos.local -4 in the Windows command prompt. - MacOS via the BoardTool Terminal.
-
Alternatively you can use a tool like "Angry IPScanner". Download from here
-
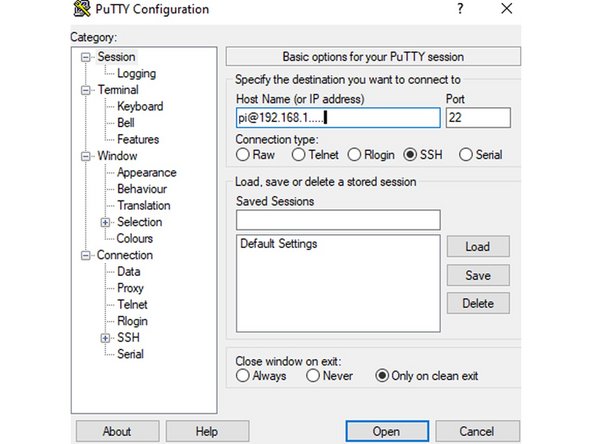
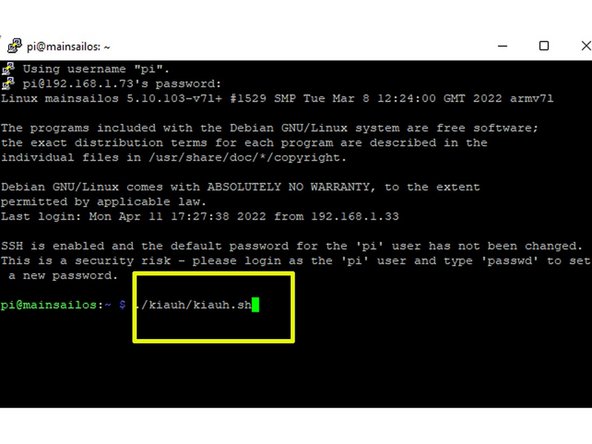
We now start the tool Putty and establish a SSH connection to the system. Username is "pi" and the password is "raspberry" - MacOS via the tool Cyberduck - New connection - SFTP (SSH connection) the determined iP address and BN and PW as described above
-
The first time you start a new connection, Putty will normally issue a security warning. This can be confirmed.
-
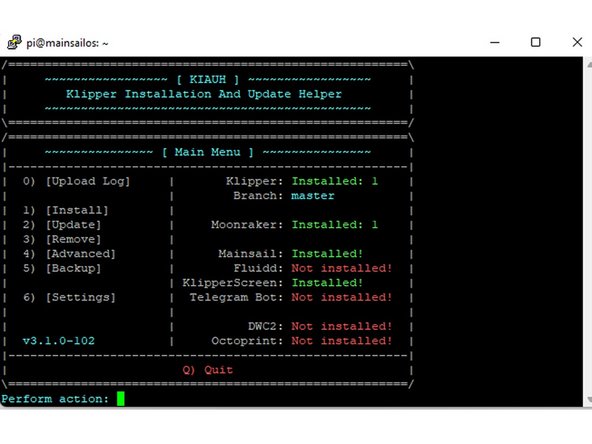
In the terminal we now enter the command ./kiauh/kiauh.sh and confirm with Enter. After a few seconds the KIAUH window should open (Klipper Installation And Update Helper).
-
-
-
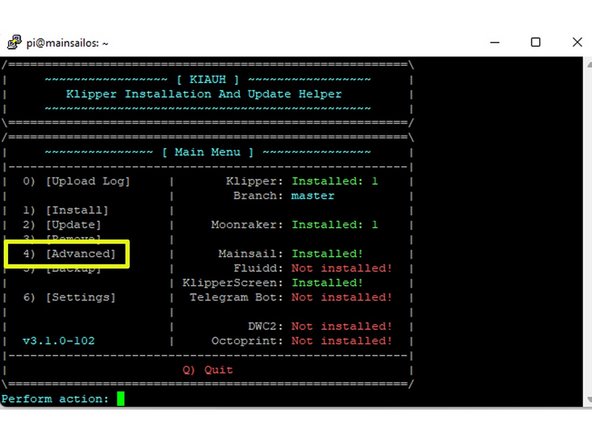
In KIAUH we open the ADVANCED section by entering 4 and Enter.
-
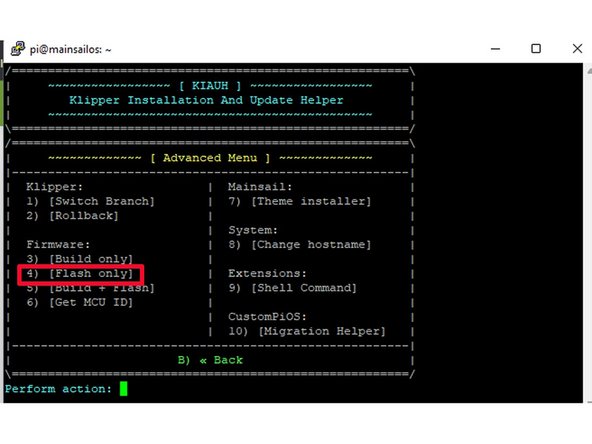
We now select point 4 (Flash only), confirm with Enter and select point 1 (Regular flashing method) in the following window.
-
As connection we select type 1 (USB) and confirm with Enter. KIAUH now determines our MCU ID. We select 1 again and confirm the security question with y (continue). Now the firmware is flashed to the Einsy board.
-
-
-
We leave the Putty window open and start a browser. We enter our IP as the address. The Mainsail GUI should now open.
-
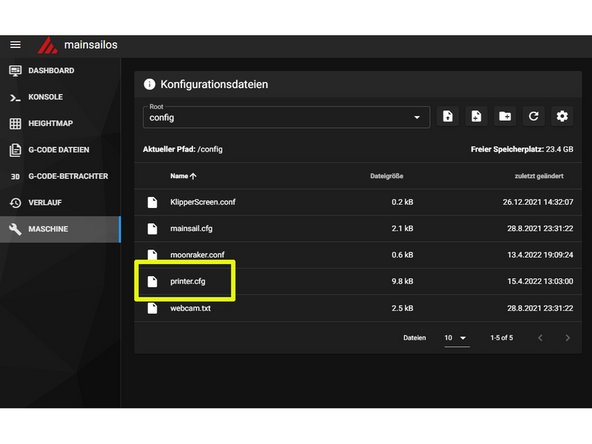
We open the machine section and there the configuration file printer .cfg.
-
We go back to our Putty terminal and now go to point no. 6 (Get MCU ID). As connection method we choose again 1 (USB).
-
KIAUH will now get our MCU ID (we have already seen it briefly in step no.5). We mark the ID and copy it to the clipboard.
-
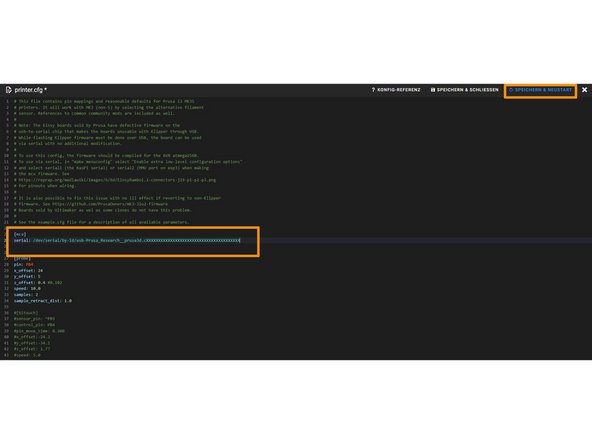
We go back to Mainsaill/printer.cfg and paste the ID in line 24. (after serial: please leave a space). Via Save and Restart in the upper right corner we leave the menu.
-
-
-
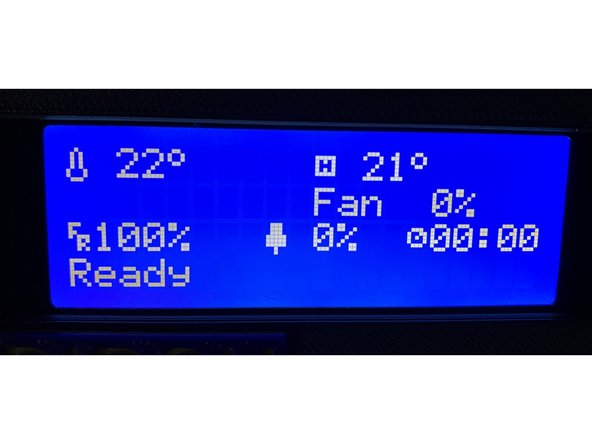
After restarting, the printer display should show the temperature of the heatbed and the hotend.
-
If you use a Slice HT thermistor, you have to set the sensor_type: SliceEngineering 450 in the printer.cfg file in line 216. The new thermistor from Slice (white wire) should work without adjustment.
-
The display functions are limited to a few basic elements. The printer is controlled almost exclusively via the GUI or via KlipperScreen (already included in the image).
-
-
-
Check the axis directions incl. extruder. If a direction is wrong, either an exclamation mark must be prefixed to dir_pin in printer.cfg under "stepper" or deleted.
-
Checking the fans and temperatures
-
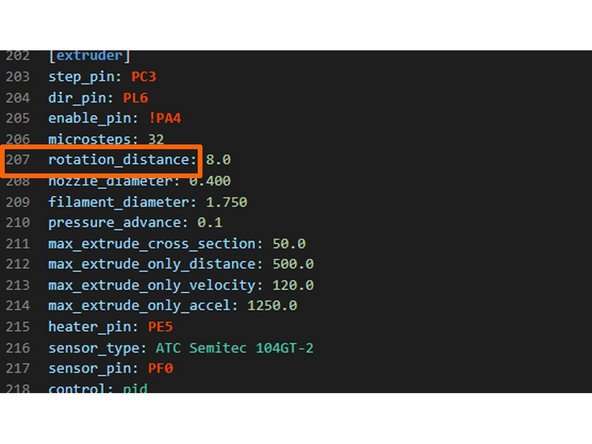
Setting the Esteps. The default is for a LGX with 1.8 motor. The steps are entered in printer.cfg under rotation_distance according to the following formula: rotation_distance = <full_steps_per_rotation>*<microsteps>/<steps_per_mm>
-
Set Z-Offset
-
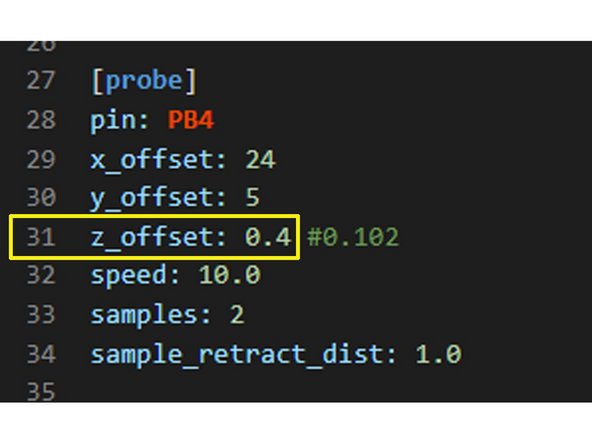
For the Z-Offset there is a separate HowTo. You should start with a "safe" value first, so that the Nozzle does not move into the print bed. The setting is done in line 31 of the printer.cfg file The value on the photo has to be adjusted individually.
-
PID tuning. There is also a separate HowTo on this topic .
-
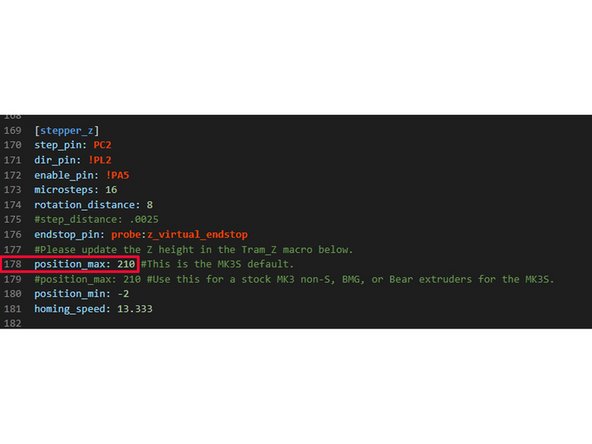
Change of Zmax for 220/320/420 in line 178 printer.cfg
-
Possibly optimization of the values for current/currents (run current, hold current)
-
-
-
An mjpg stream is already implemented in Mainsail. Common USB cams like a Logitech C270 should work "out of the box".
-
We go to Settings (gear icon on the top right) > Webcams. The default: URL: /webcam/?action=snapshot can normally be used.
-
-
-
It is usually no problem to reload the old firmware via Prusaslicer if the Klipper system does not work.
-
-
-
Thanks go to Sven Kratzmeier for providing his configuration files, and to Bernd Brinkert for providing the German manual and the image cariclipp.img
-