Introduction
A correctly set Z offset is the basis of every, orderly print. We know this procedure from the old firmware as “ live-Z adjust ”, which is carried out via the LCD menu. We do something different under Klipper / Mainsail. The prerequisite is that the PINDA sensor is already running. Caribou manual has been set to the correct height.
-
-
We open the file printer.cfg and change the default for in line 31 z_offset: from 0.4 on 0.0. This value is saved and it is restarted.
-
If PINDA2 / Superpinda are installed correctly, this value is from 0 relatively safe, i.e. the nozzle should not touch the pressure bed at first.
-
We check whether the nozzle is free of filament residues and remove them if necessary.. Since the programmers from Klipper recommend a Z offset setting with cold nozzle and cold heatbed, this step is particularly important!
-
-
-
We open the dashboard in the mainsail interface and first reference all axes. Then we drive the extruder in the middle over the pressure bed.
-
The sheet is already on!
-
Next we send the command via the console G1 Z0. The nozzle should then have a sufficient distance (approx. 1-2 mm) from the pressure bed.
-
We now take a sheet of paper (normal copy paper), put it under the nozzle and shut it down over the control buttons in the dashboard until the paper is held.
-
About Z offset we then adjust the height a little more precisely. The paper should be able to move under the nozzle with some resistance, but it must not tear down.
-
If we cannot shut down far enough, the printer.cfg file must be under [stepper_z] the value for position_min be further reduced, e.g. to -2.5.
-
These steps should be played through several times in succession until a reproducible result is available.
-
-
-
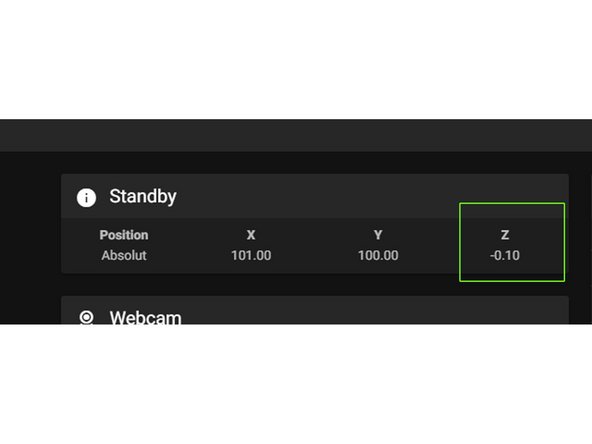
We can now read the new Z-offset in the dashboard at the top under standby / position.
-
The (actually negative) value is now, without minus sign (!!), in line 34 of the file printer.cfg registered. We then go to Save and Restart.
-
The value of -0.10 in the screenshot is only exemplary and in most cases should be approx. Between -0.5 and -1.5 mm.
-
-
-
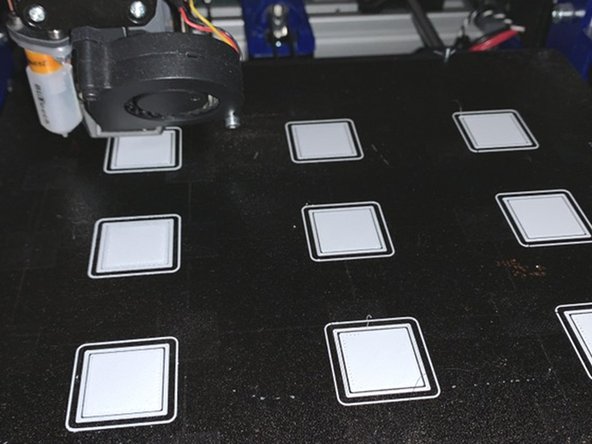
We can now start a calibration print. There are numerous templates on Thingiverse (e.g. B. this)
-
New line If we are a little too deep, we can go a little higher via baby steps and vice versa. The higher our value, the lower the nozzle goes down!!
-
-
-
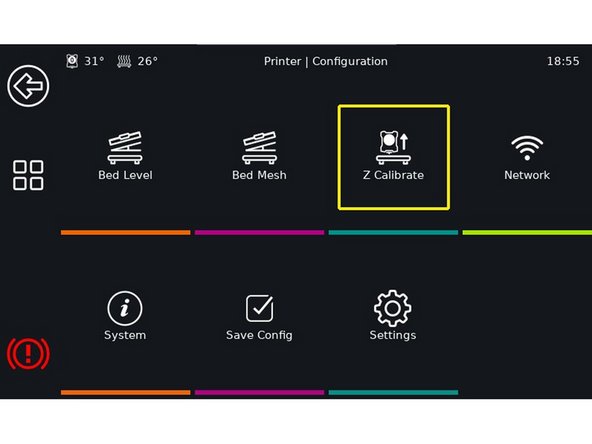
Alternatively - if a touchscreen is available - Clipper screen to set "Z" be used.
-


