Difficulty
Moderate
Steps
21
Time Required

User-Contributed Guide
This guide is not managed by the site's staff.
Quiz
0
Introduction
Manual for installing the LGX - Mosquito extruder on a 10mm Caribou. This manual covers the FDM as well as the SLS printed parts.
-
-
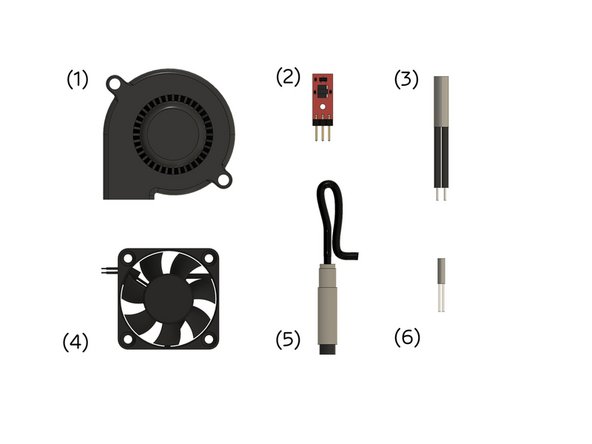
(1) Radial fan
-
-
(3) Heater
-
(4) Sunon fan
-
(5) PINDA2 / SuperPINDA
-
(6) Thermistor
-
(7) Nylonfilament (not in the picture)
-
Caribou 220: 47cm Caribou 320: 57cm Caribou 420: 67cm
-
-
-
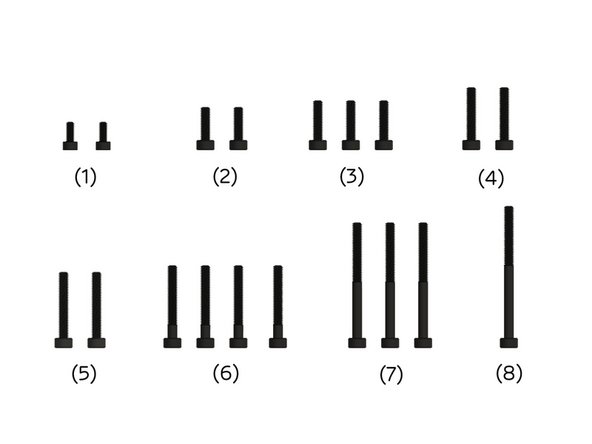
(1) 2x M2.5x6mm head cap screws (supplied with Mosquito hot end)
-
-
-
-
-
-
-
-
-
-
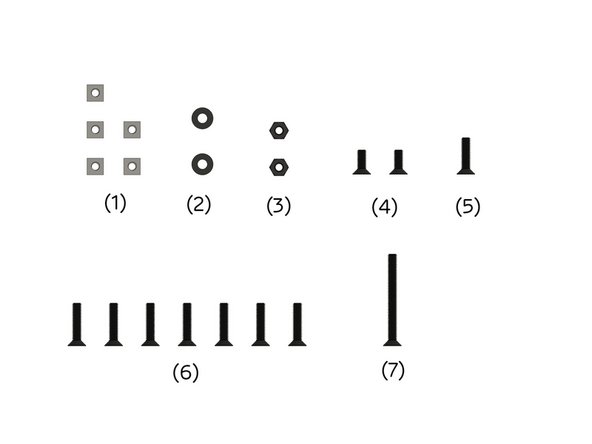
(1) 5x M3 square nuts
-
(2) 2x M3 washers
-
(3) 2x M3 nuts
-
-
-
-
(7) M3x30mm hex drive flat head screw
-
-
-
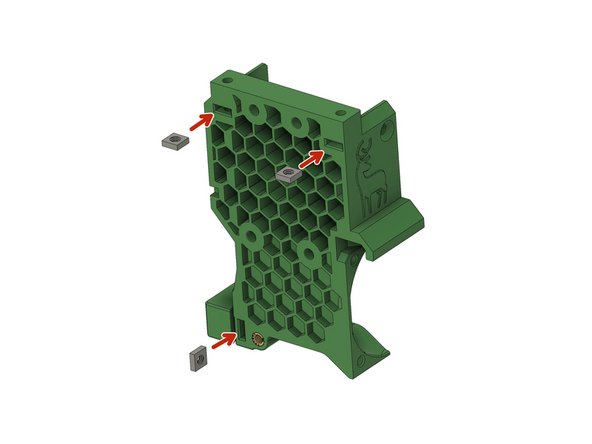
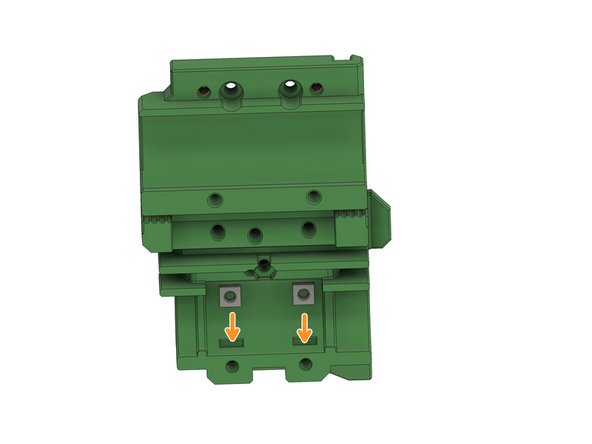
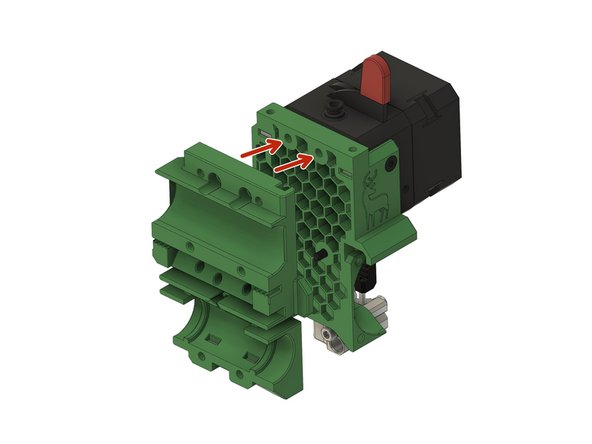
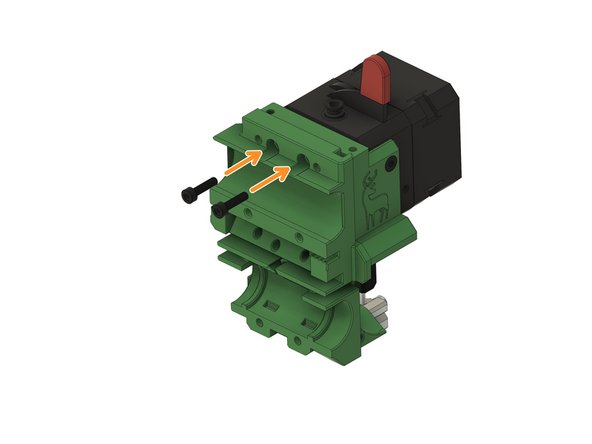
Insert 3x M3 square nuts into the back of the LGX holder.
-
Insert 2x M3 square nuts into the botton of the x-carriage.
-
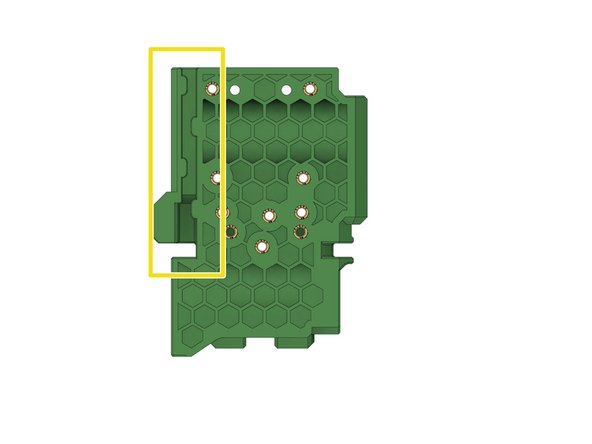
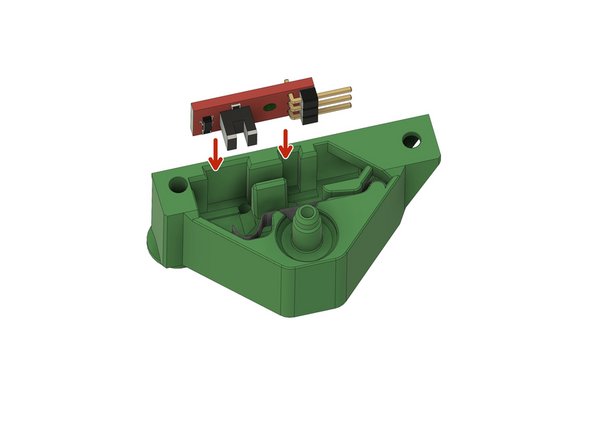
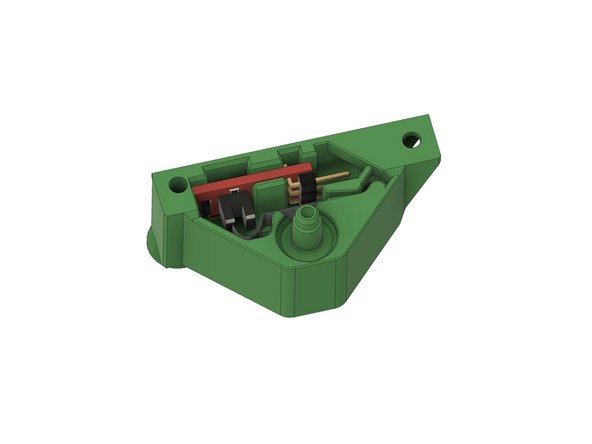
Route the cable of the filament sensor through this channel. Let the cable stand out about 4cm at the top.
-
Make sure the cable has the correct orientation. The 3-pin connector goes to the sensor, the 5 pin connector goes to the board.
-
-
-
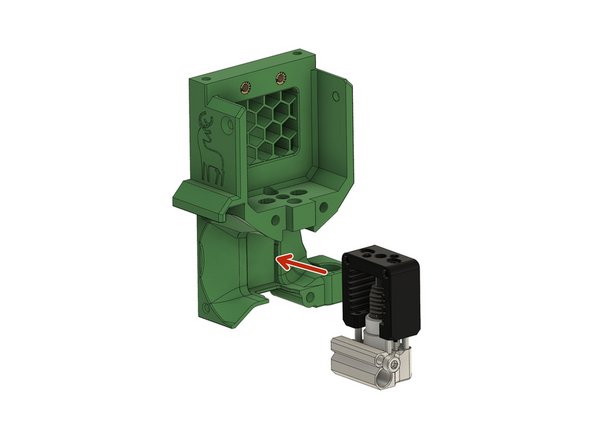
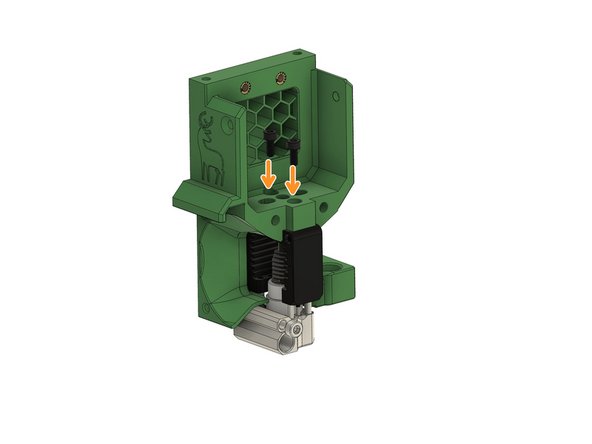
Slide the hotend into the LGX holder.
-
Use 2x M2.5x6mm head cap screw to secure the hotend in place.
-
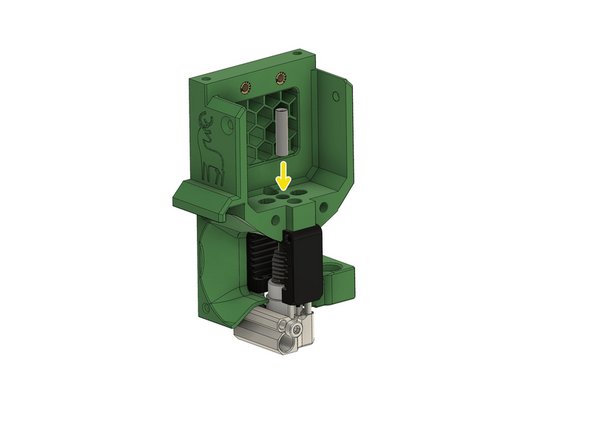
Cut the PTFE tube to 19.7mm length using the provided cutting tool.
-
Slide the PTFE tube into the middle hole. Make sure to insert the tube all the way into the top of the Mosquito.
-
Make sure the chamfered side of the tube shows to the top.
-
-
-
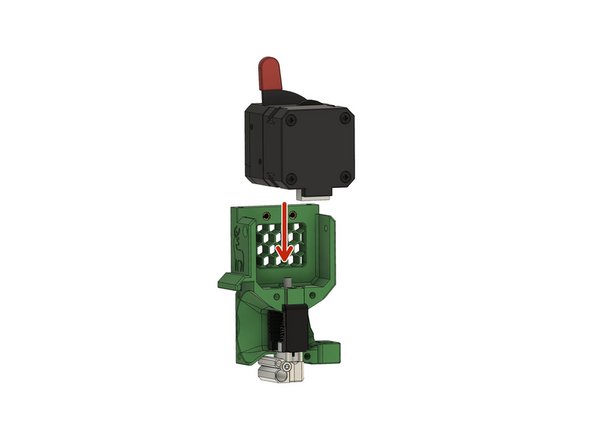
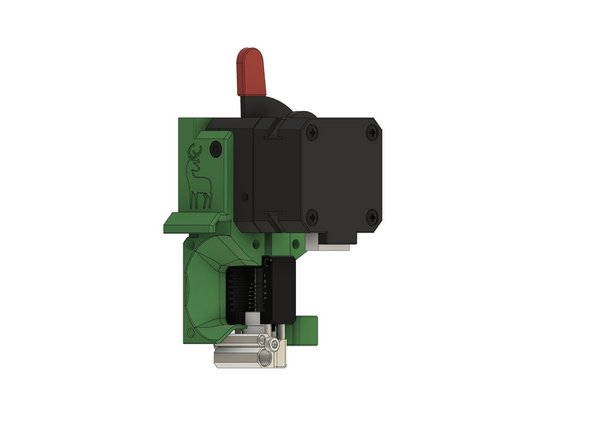
Carefully slide the LGX extruder into place.
-
Make sure the PTFE tube slides into the hole at the bottom of the extruder.
-
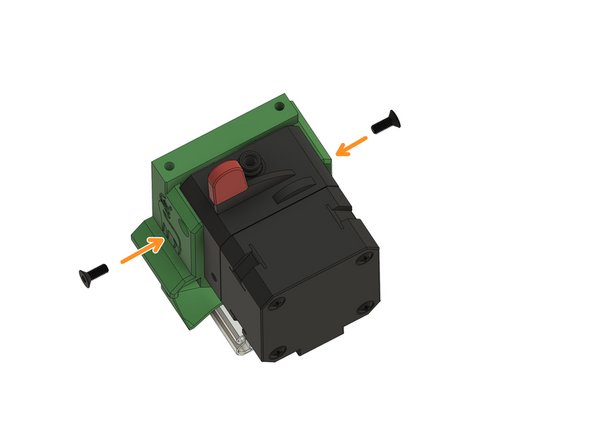
Use 2x M3x6mm flat socket head cap screws to secure the extruder.
-
-
-
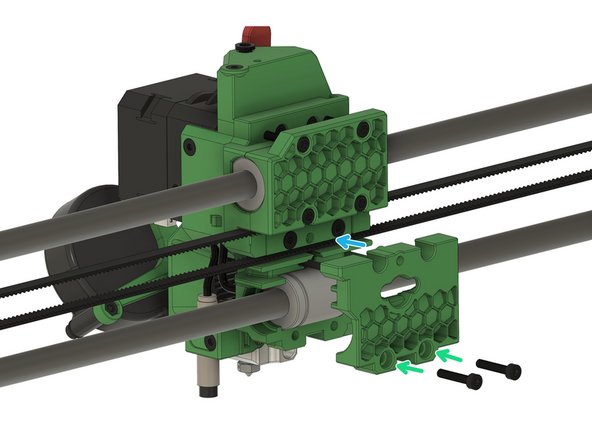
Place the back of the x-carriage against the back of the LGX holder.
-
Make sure that the cable of the filament sensor sits in the channel of the x-carriage and is not pinched between the two plastic parts.
-
Use 2x M3x12 head cap screws to screw the parts together.
-
-
-
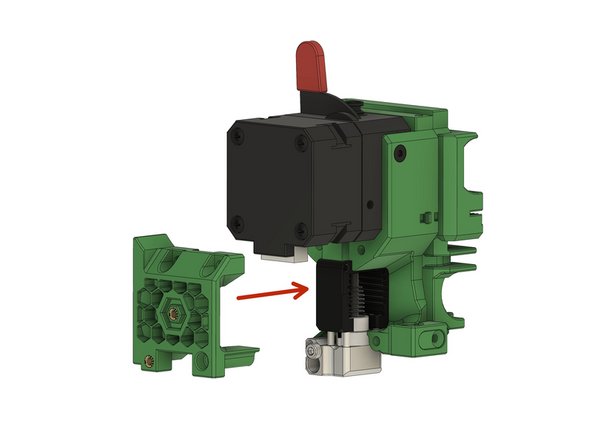
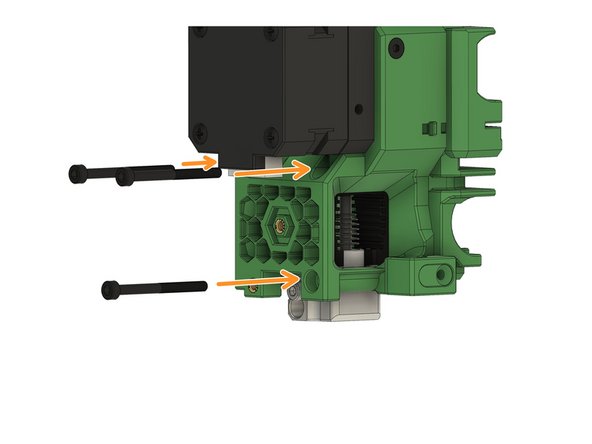
Attach the cover (as shown in picture 1) to the front of the holder.
-
Use 3x M3x35mm head cap screws to fasten the cover.
-
-
-
Connect the motor cable to the motor and route the cable through the channel.
-
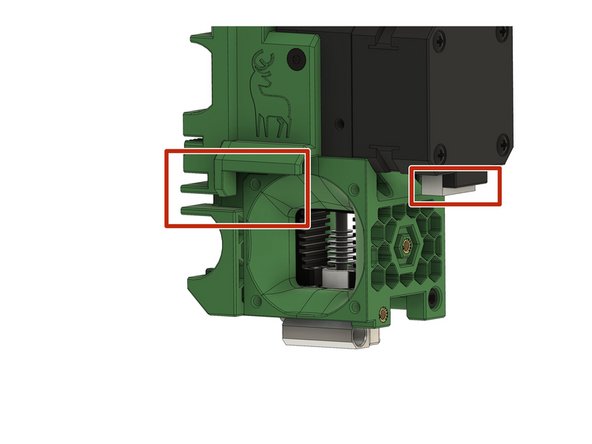
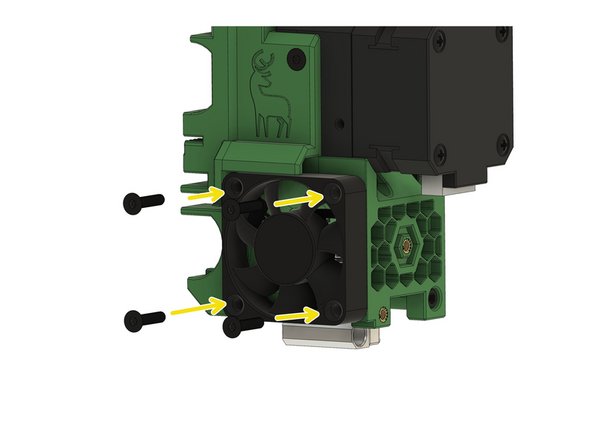
Place the extruder on the LGX holder in such a way that (1) the cables are pointing towards the channel and (2) the sticker on the fan is pointing towards the inside of the extruder.
-
Use 4x M3x16mm flat socket head cap screws to fasten the extruder fan.
-
Route fan's cable through the channel to the back of the x-carriage.
-
-
-
Push 2x M3 nuts into the radial fan holder.
-
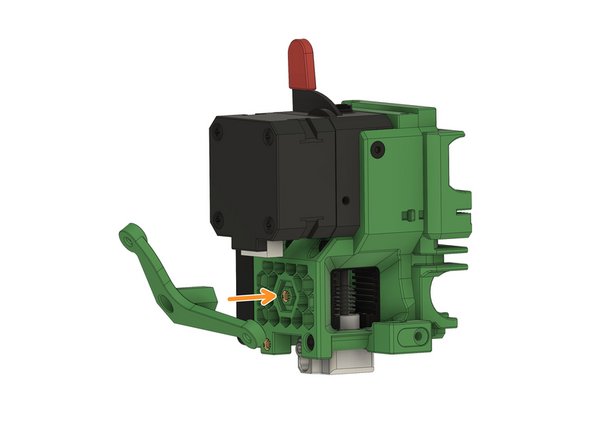
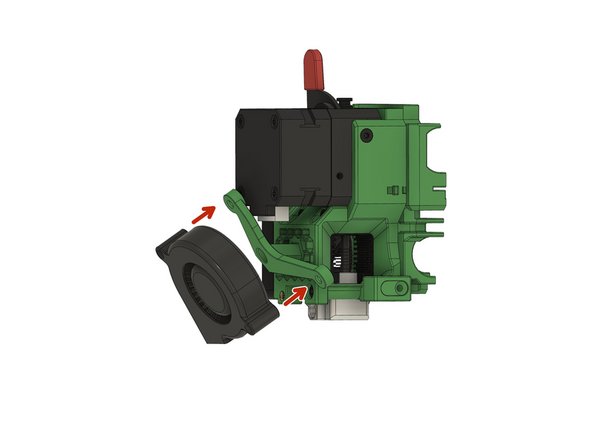
Place the radial fan holder in front of the cover.
-
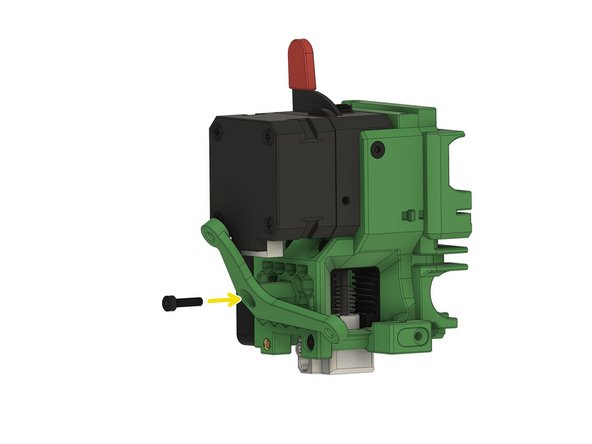
Use a M3x12mm head cap screw to fasten the holder.
-
-
-
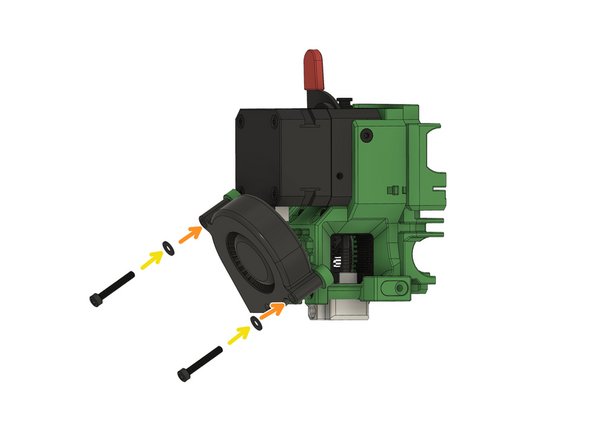
Place the screw holes of the radial fan in front of the screw holes of the radial fan holder.
-
Pay attention to the orientation of the fan.
-
Use 2x M3 washers and...
-
2x M3x20mm head cap screws to fasten the fan to the holder.
-
-
-
Insert the PINDA / SuperPINDA into the hole on the side of the holder.
-
Fasten the sensor with a M3x12mm flat socket head cap screw.
-
First, route the cable of the radial fan through the channel.
-
Form a loop with the sensor cable and route it through the channel.
-
Fasten the loop with a zip-tie to the LGX holder.
-
-
-
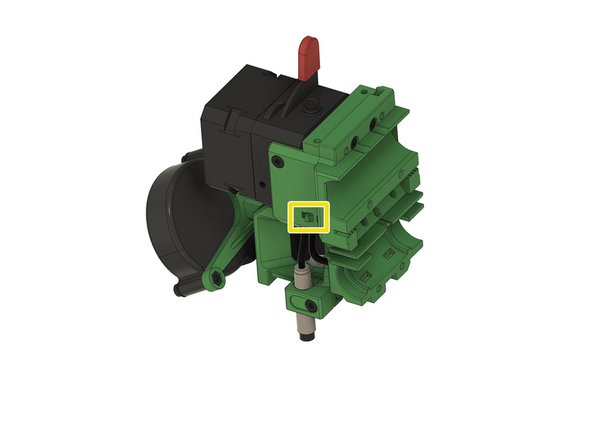
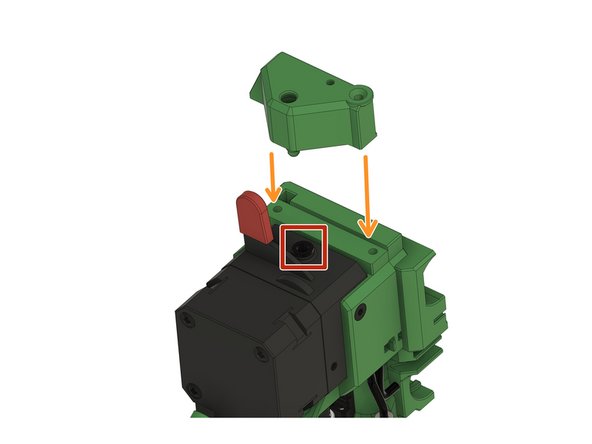
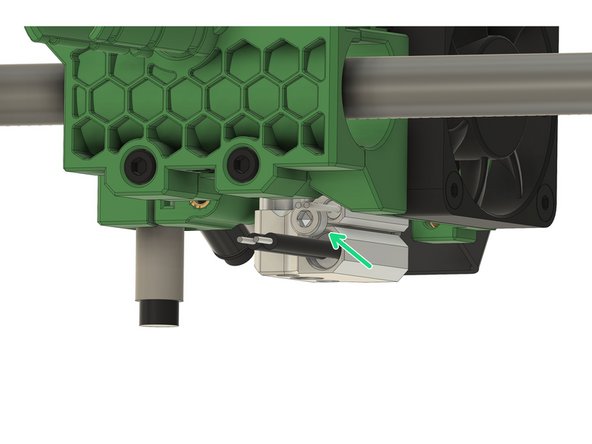
Remove the bowden coupler from the extruder.
-
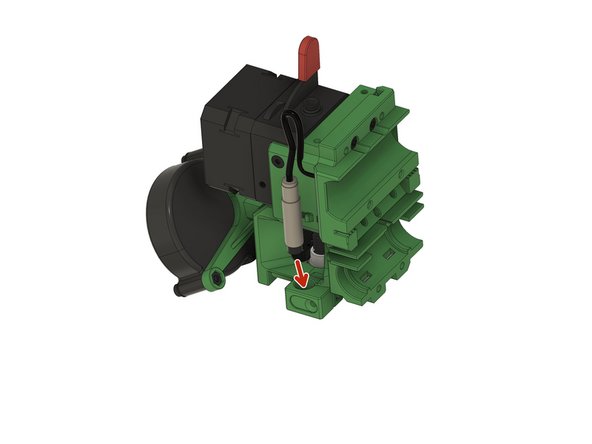
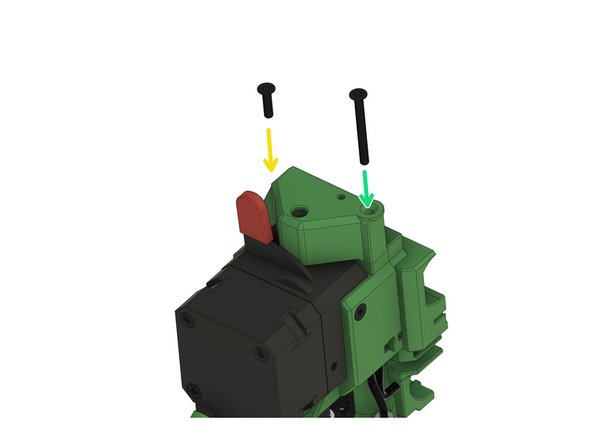
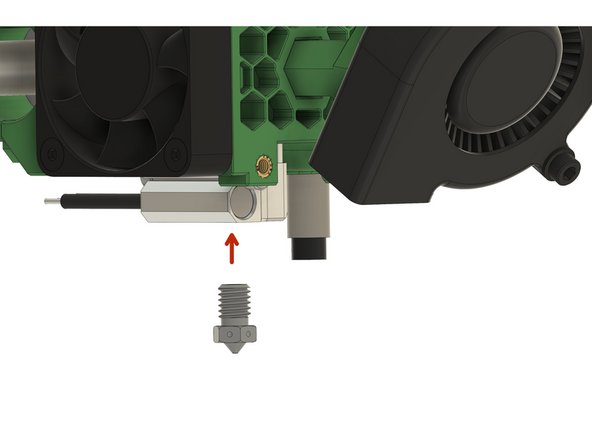
Place the sensor housing on top of the extruder.
-
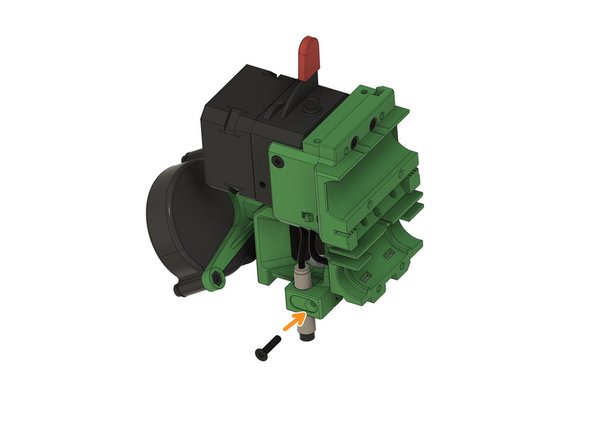
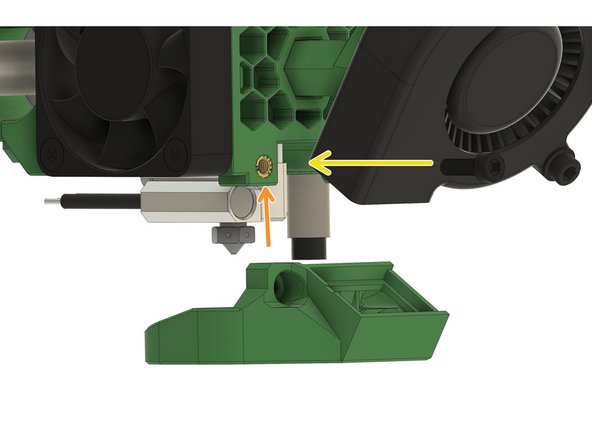
Use a M3x12mm flat socket head cap screw...
-
...and a M3x30mm flat socket head cap screw to fasten the filament sensor housing.
-
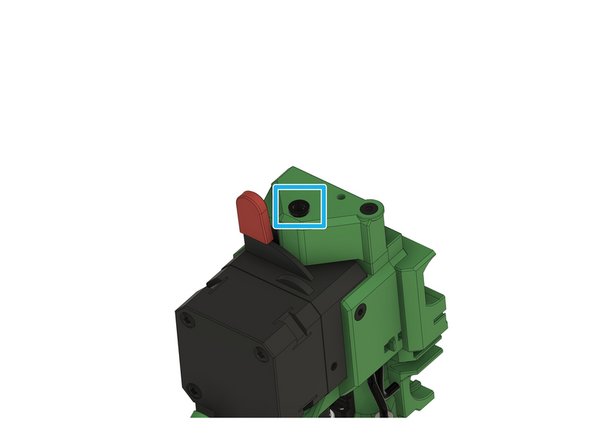
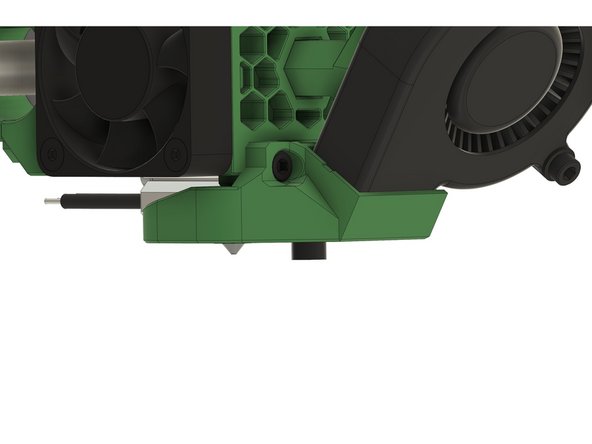
Insert the bowden coupling into the filament sensor housing.
-
Attach the cable to the sensor.
-
-
-
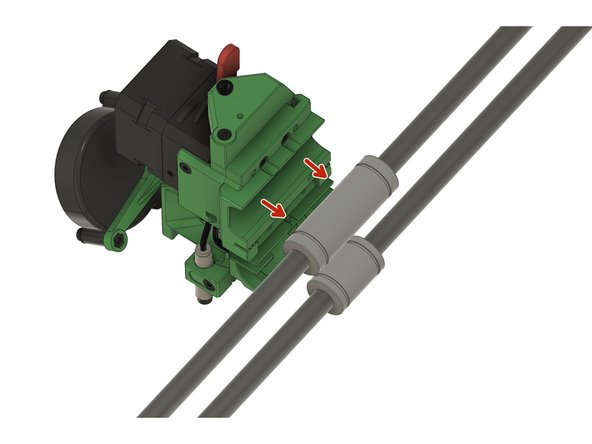
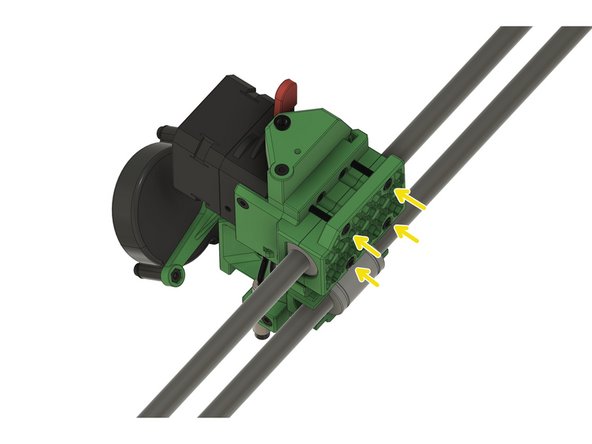
Align the bearings with the x-carriage back.
-
Bring the top holder back into position.
-
Use 4x M3x22 head cap screws to fasten the back part.
-
Do not overtighten the screws!
-
-
-
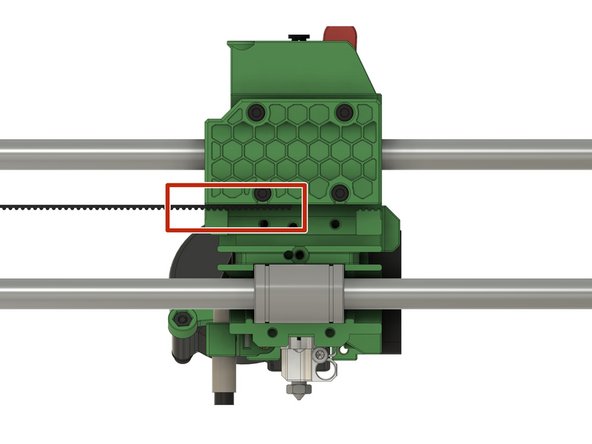
Insert one end of the belt into the x-carriage. It should be inserted half way into the x-carriage.
-
Route the belt through the x-idler and the x-motor holder (not shown here).
-
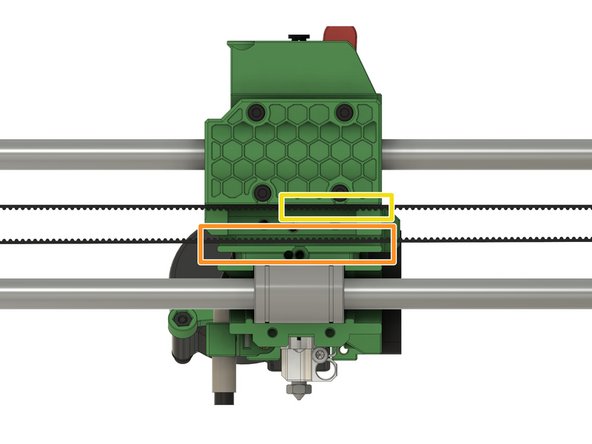
The belt must run through the lower channel of the x-carriage.
-
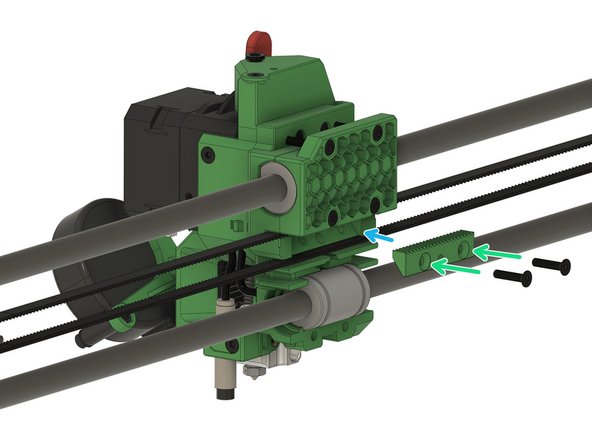
Cut the belt so that you can insert the other end of the belt into the x-carriage. Both belt ends should touch each other inside the x-carriage.
-
Use 2x M3x14mm flat head screws to...
-
...fasten the belt holder into the x-carriage.
-
-
-
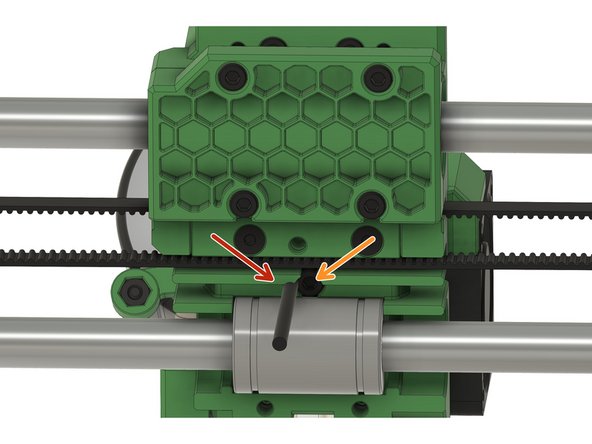
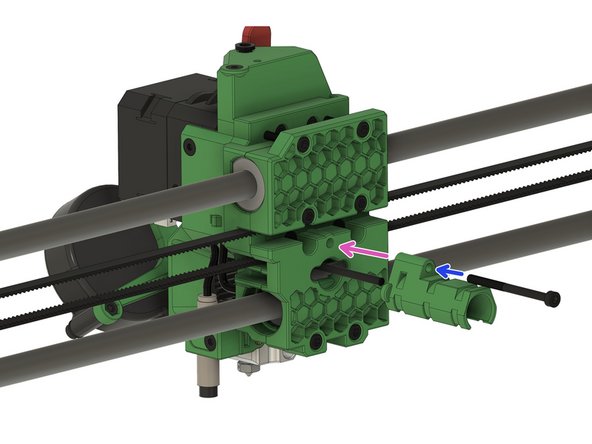
Insert the 2.85mm nylon filament into the hole next to the screw hole.
-
Use a M3x10mm head cap screw to secure the nylon filament in position.
-
Route the cables for the fans, the PINDA, the filament sensor cable, and the extruder motor through the hole.
-
Use 2x M3x16mm head cap screws to...
-
...fasten the carriage's back bottom part to the x-carriage.
-
Use a M3x40mm head cap screw to...
-
...fasten the cable holder to the x-carriage.
-
-
-
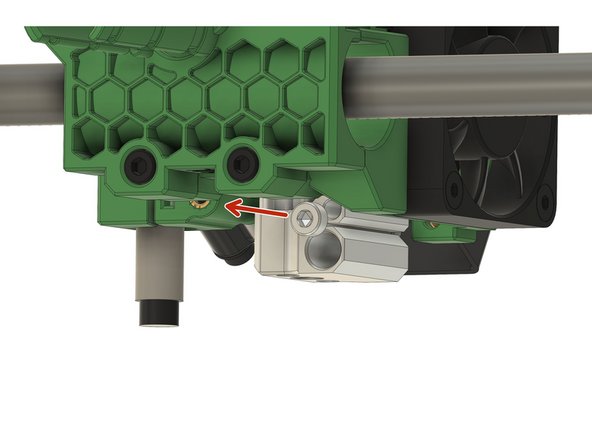
Remove the M2.5x5mm head cap screw on the back of the Mosquito.
-
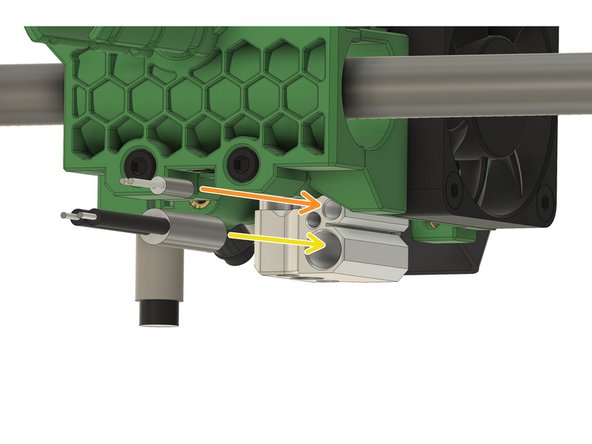
Apply boron nitride paste to both the heater cartridge and the thermistor cartridge.
-
Insert the thermistor cartridge into the upper hole.
-
Insert the heater cartridge into the lower hole.
-
Fasten the M2.5x5mm head cap screw to secure the cartridges.
-